To move your WordPress from the local server to the live site, follow the steps given below:
I) Install and setup the Duplicator Plugin
1. Install and activate the Duplicator plugin on your local site.
2. After the successful installation of the plugin, go to Duplicator> Packages. Then click on the Create New button.

3. After that, click on the Next button.
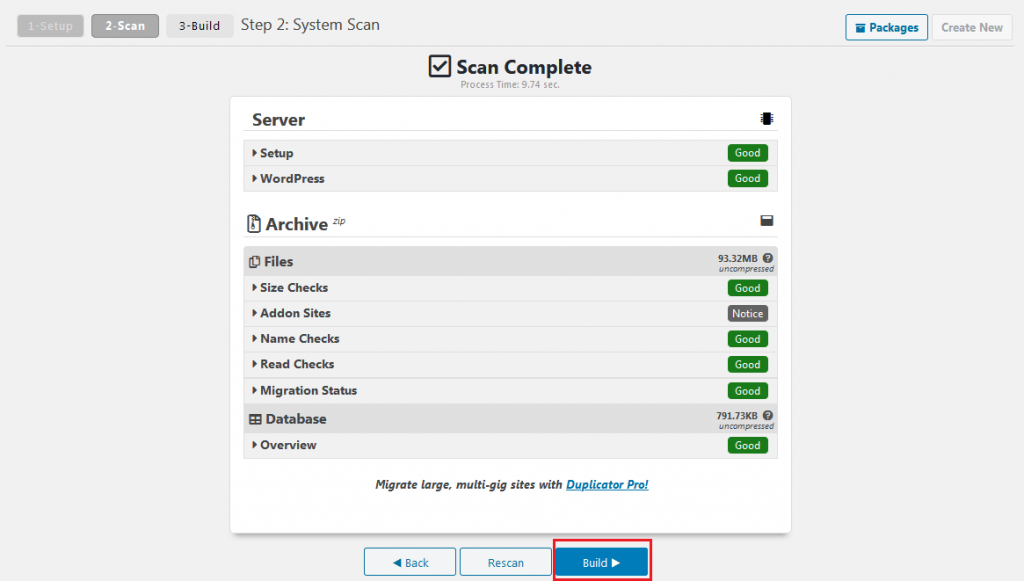
4. Now Duplicator will scan your system to check if everything is in order or not. If all the options are marked Good then click on the Build button. It will take some time to complete the process.
5. After the process is completed, a new window will appear. In this window click on the One-Click Download button.
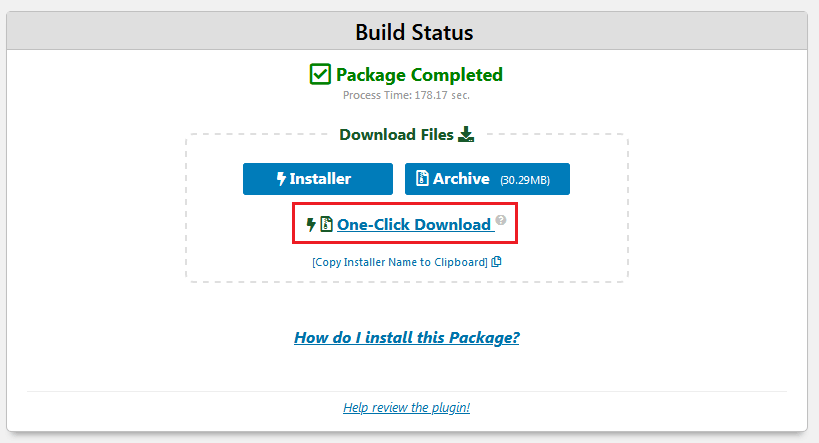

Now both the Installer and Archive files will be downloaded to your computer. The archive file contains a copy of your WordPress website and the Installer file is a script that automates the migration.
II) Create a Database for your live site
If you already have a MySQL database then, skip this step. If you need to create one, then follow the steps:
1. Log in to your cPanel dashboard.
2. Then click on the MySQL Database option present in the DATABASE section.

3. Lookout for the section named Create New Database. Enter the name of your database. Click on the Create Database button.
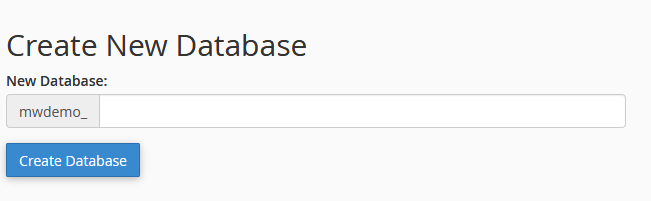
Now a new database will be created.
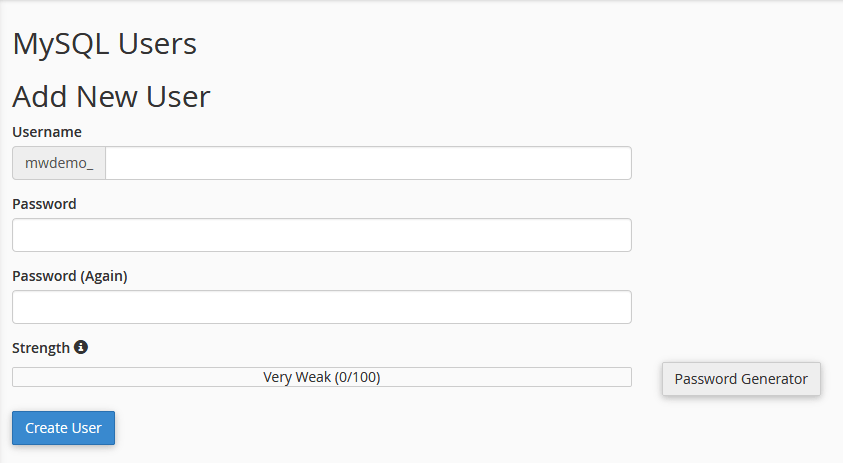
4. In the MySQLUser section enter a username and password for your new user. After filling out all the fields click on the Create User button.
5. In the Add User To Database section, select the user and database that you have created. Click on the Add button.
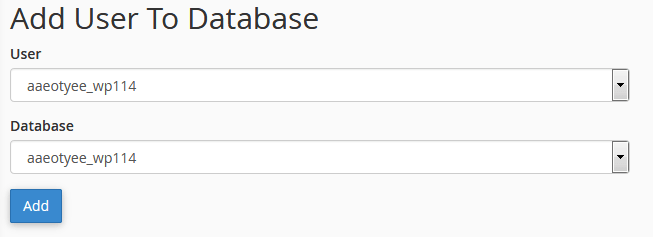
6. Next you will be redirected to the Manage User Privileges Page, Select all privileges and save.
Note down the username, password, and database name as we will use this information afterward.
III) Upload files from local server to live site
1. Using an FTP client connect to your live site.
2. Go to the root directory i.e. /home/public_html/ folder. Some preconfigured WordPress may be provided by the hosting company. Delete those files. 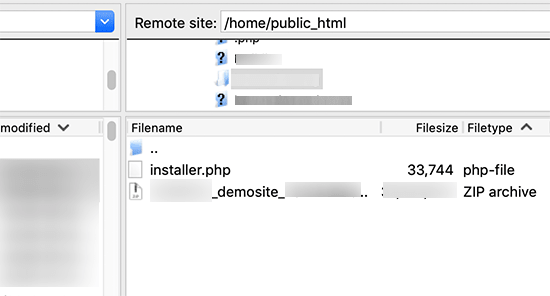
3. Here upload the archive and installer files, that you have downloaded from Duplicator.
IV) Run the migration script
1. Open your browser, and enter the link given below:
http://example.com/installer.php
You have to enter your domain name in the place of 'example.com'.
2. Now the Duplicator migration wizard will open and it will look like the below picture:
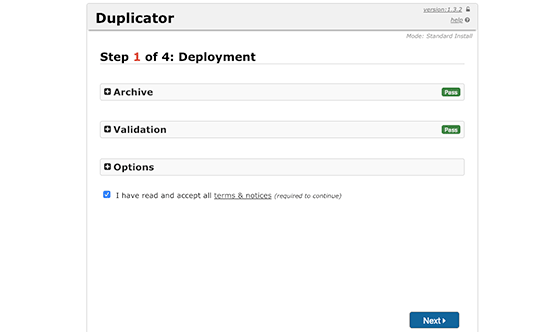
The installer will scan for the archive files and it will also run a validation test.
Check the box near terms and conditions, then click on the Next button.
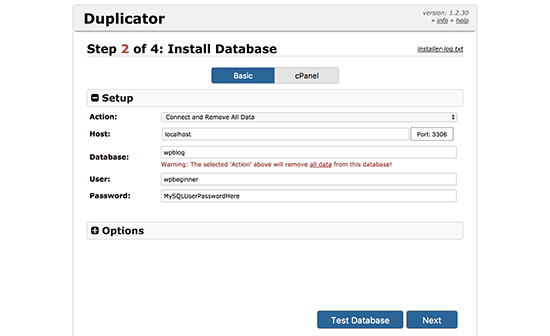
3. In the next window enter your WordPress database information.
The host will be localhost. Then enter the details of the database that you have created in the previous step. After filling up all the information in their respective fields, click on the Next button.
4. Your database backup will now be imported to a new database with the help of the Duplicator.
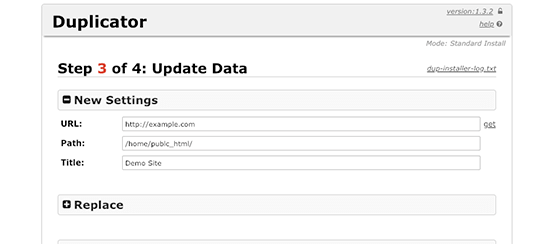
5. In the next window your site URL and path will be automatically detected and filled up. If not detected, then write these manually. After completion, click on the Next button.
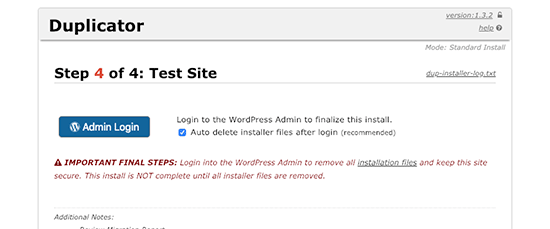
6. Now a screen will show up where it will confirm that the migration is complete. Then click on the Admin Login button and enter your login credentials. This will enable you to enter the admin area of your live site.
That's it !! You have successfully moved your WordPress site from the local server to the live site using the Duplicator plugin.