After customizing your website on your local server, you need to upload it on the internet so that anybody can see it. Follow the given steps to successfully complete the process:
I) Export your local WordPress Database
First, we are going to export our WordPress Database using phpMyAdmin.
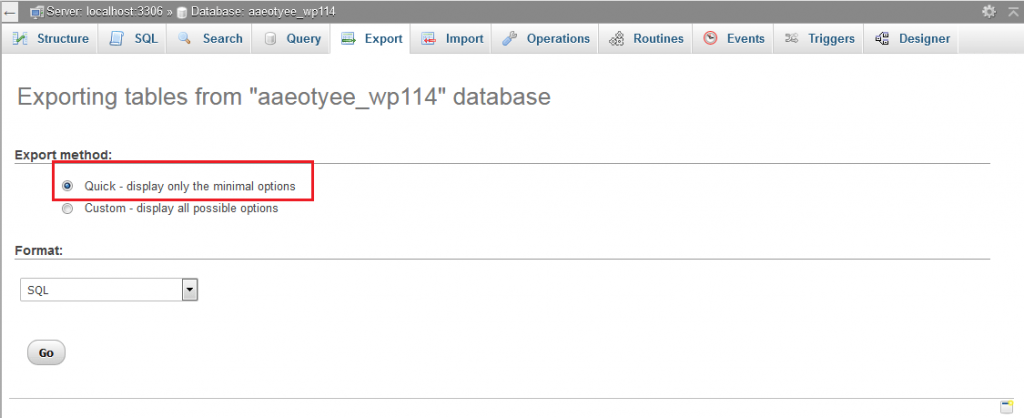
1. Go to http://localhost/phpmyadmin/ and click on your WordPress database. On the top menu bar click on the Export option.

2. In the export option you have to select either the Quick or Custom (If selecting custom then under compression select Gzipped option for a less size database file) option. For minimal options, we will select Quick and then click on the Go button.
II)Upload WordPress files to live site
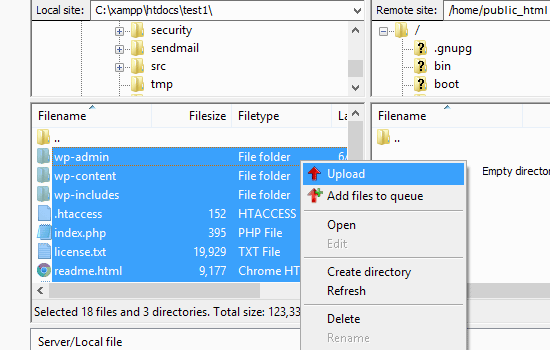
1. Open your FTP client and connect to your web hosting account.
2. Upload all the files to the public_html directory. By doing so your files will be uploaded to the live server.
III) Creating MySQL database on the live site
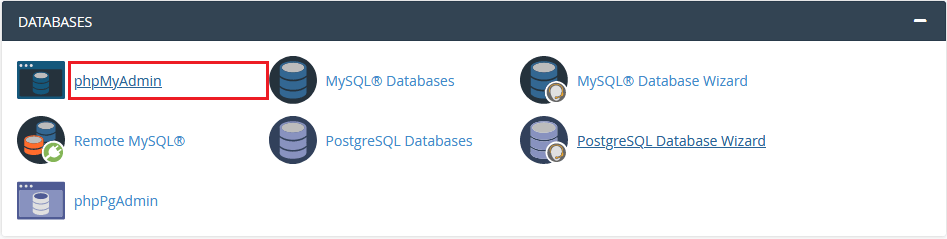
1. Log in to your cPanel dashboard and click on the MySQL database present in the Database section.

2. Enter the name of your database and then click on the Create Database button.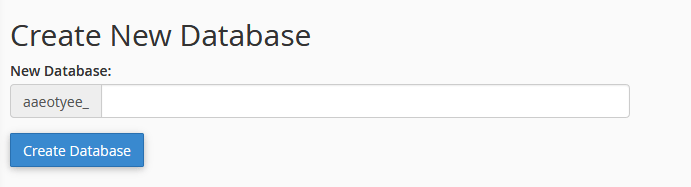
3. Create a new user or add the existing user to the database. This can be done by going to the MySQL users section.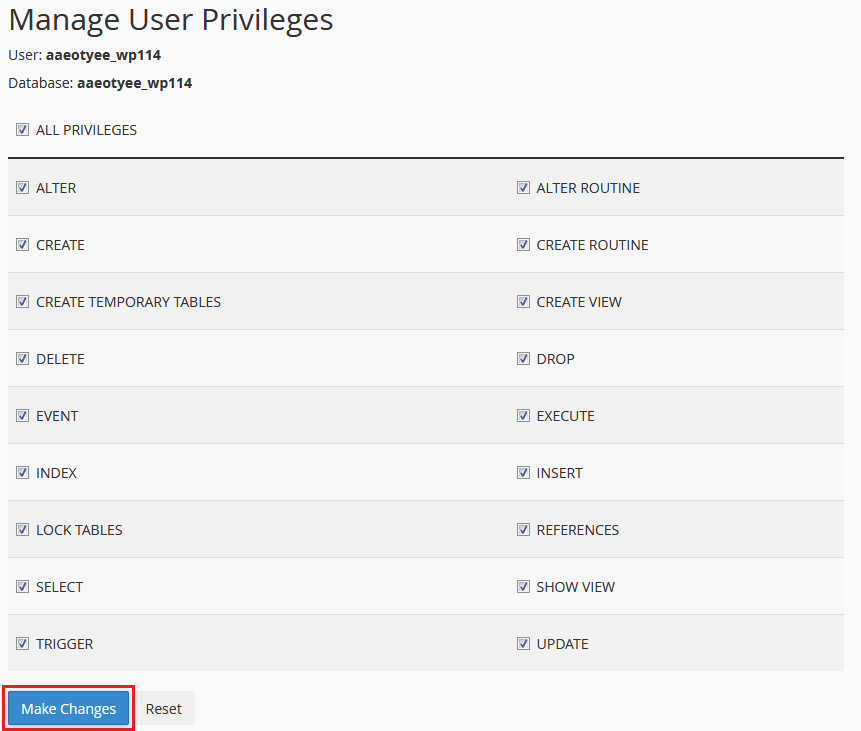
4. Next, the Manage Privileges menu will appear. Grant all the privileges to the user by checking all the boxes. Then click on the Make changes button.
IV) Import WordPress database on live site
1. First, log in to your cPanel dashboard. In the Database, section click on the phpMyAdmin option.

2. In the phpMyadmin dashboard select the database that you have created in step III.
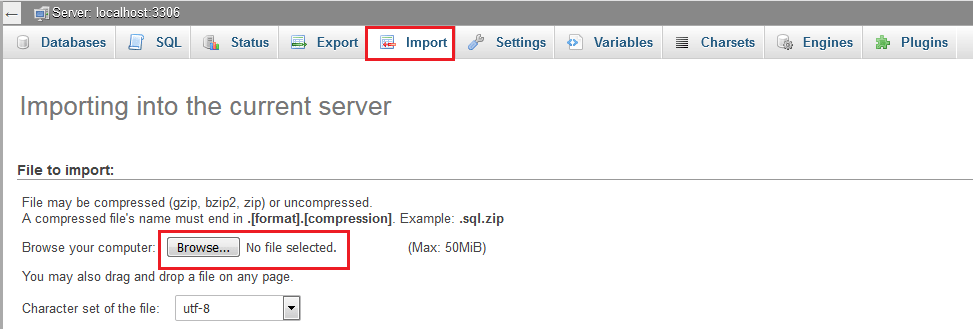
3. Click on the Go button. After that, your database will be imported.
V) Change the site URL
1. First, go to phpMyAdmin.
2. In the Database, that we have created in step IV, search for wp_options. Here the prefix 'wp' can be anything, but the suffix '_options ' should be fixed. So search for the file that has the '_options' suffix in it.

3. Then click on the Browse button present near wp_options.
4. A list/table of wp_options fields will appear. 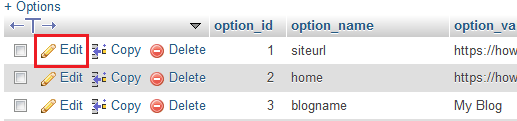
5. Navigate to the siteurl present under the option_name. Then click on the Edit option present on the left.
6. The edit field window will open. In the input box of option_value, you will see the URL of the local host, such as http://localhost/test. Delete that URL and put your new URL in that box.

7. At last click on the Go button to save all the changes.
Repeat the above process for the home URL. You can find it under the option_name: home.
VI) Setup your live site
1. If you try browsing your site now, you will get an Error Establishing Database Connection error. This can be fixed by editing the wp-config.php file by connecting to your website through the FTP client.
2. In the wp-config.php file add the database name, user, and password that we have created in step3.
3. Save the wp-config.php file and upload it to your server.
4. At last login to your WordPress admin panel and go to settings> general. Scroll down to the bottom and click on the Save Changes button. 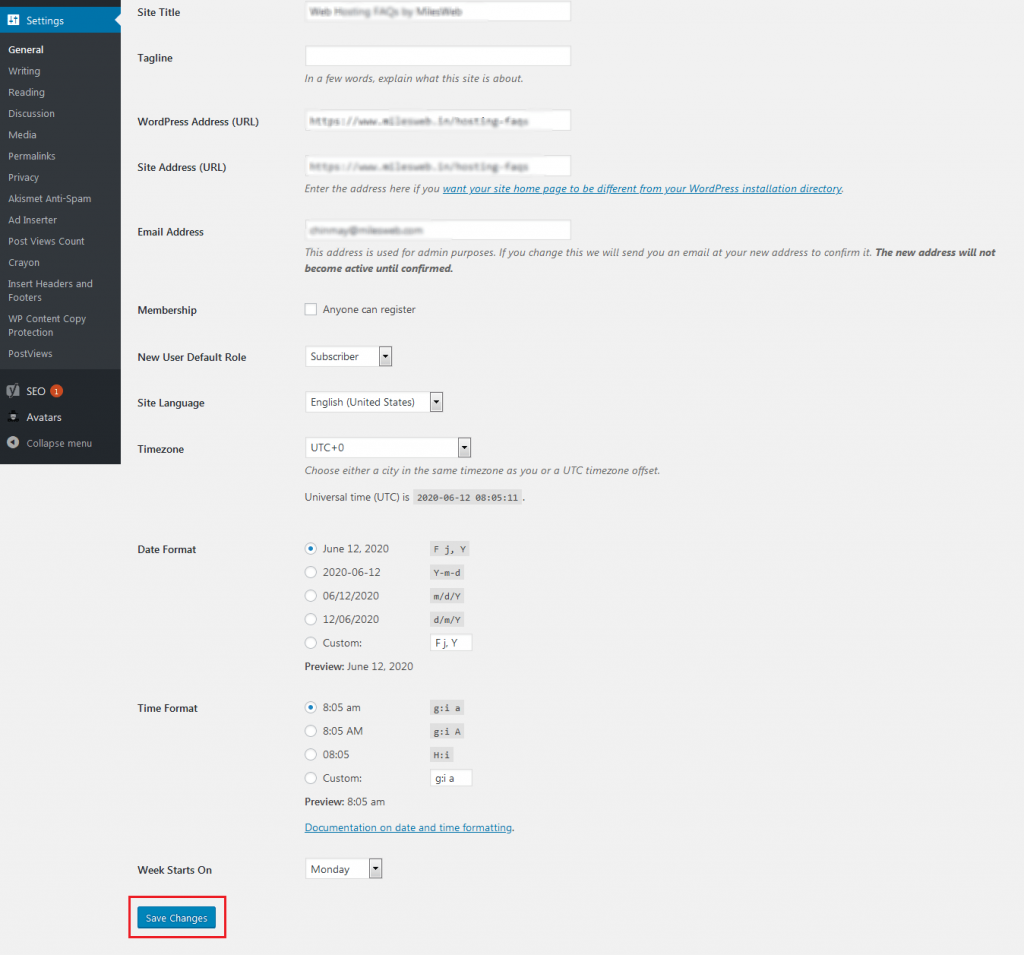
Similarly, go to Settings>Permalink and click on the Save Changes button.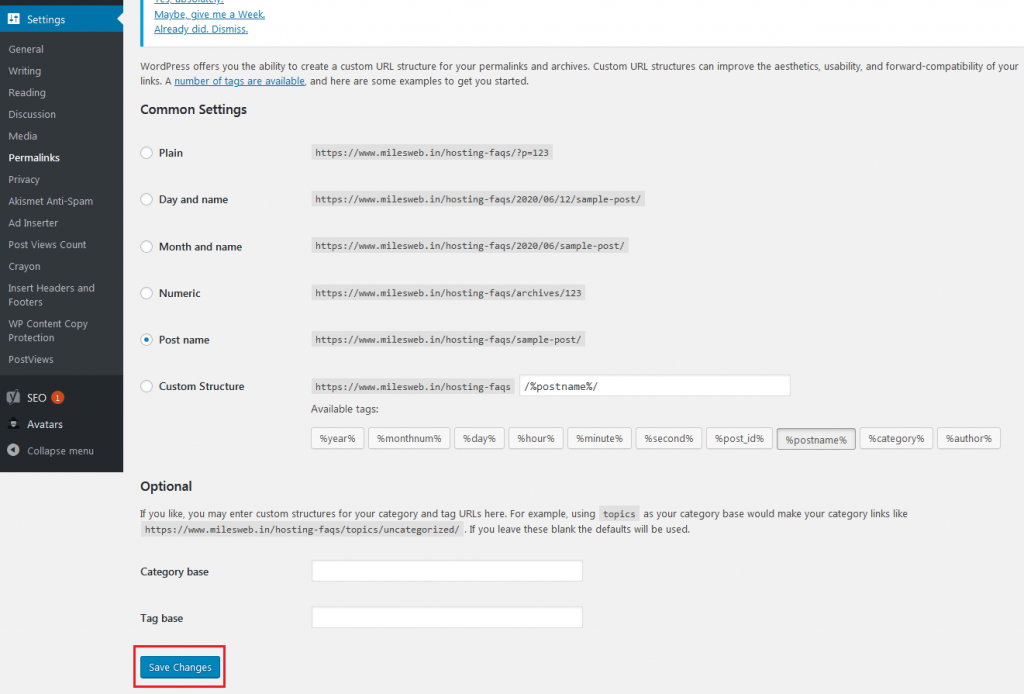
V) Fix images and broken links by updating Paths
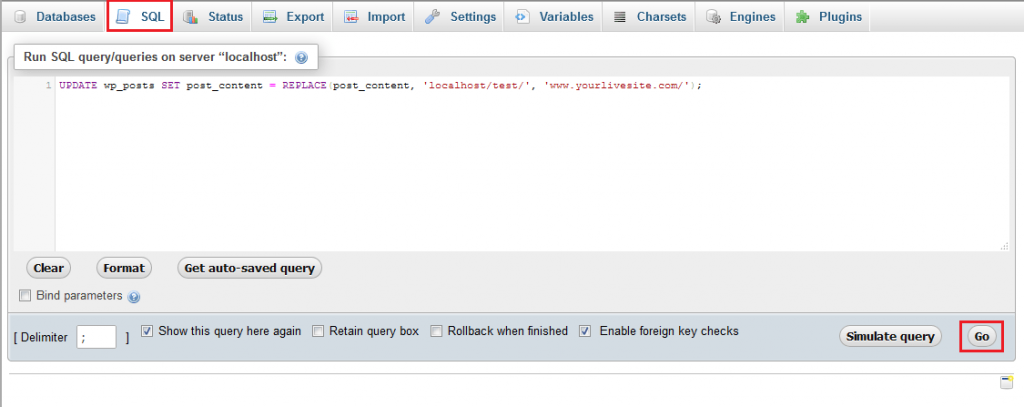
1. Go to phpMyAdmin.
2. Then click on your database.
3. On the top menu click on SQL.
4. Paste the query given below:
1 UPDATE wp_posts SET post_content = REPLACE(post_content, 'localhost/test/', 'www.yourlivesite.com/');You have to change the name of the local site and live site URLs to yours.
After the changes are done click on the Go button.
That's it. Congratulations, you can migrate the WordPress site from the local server to the live site.