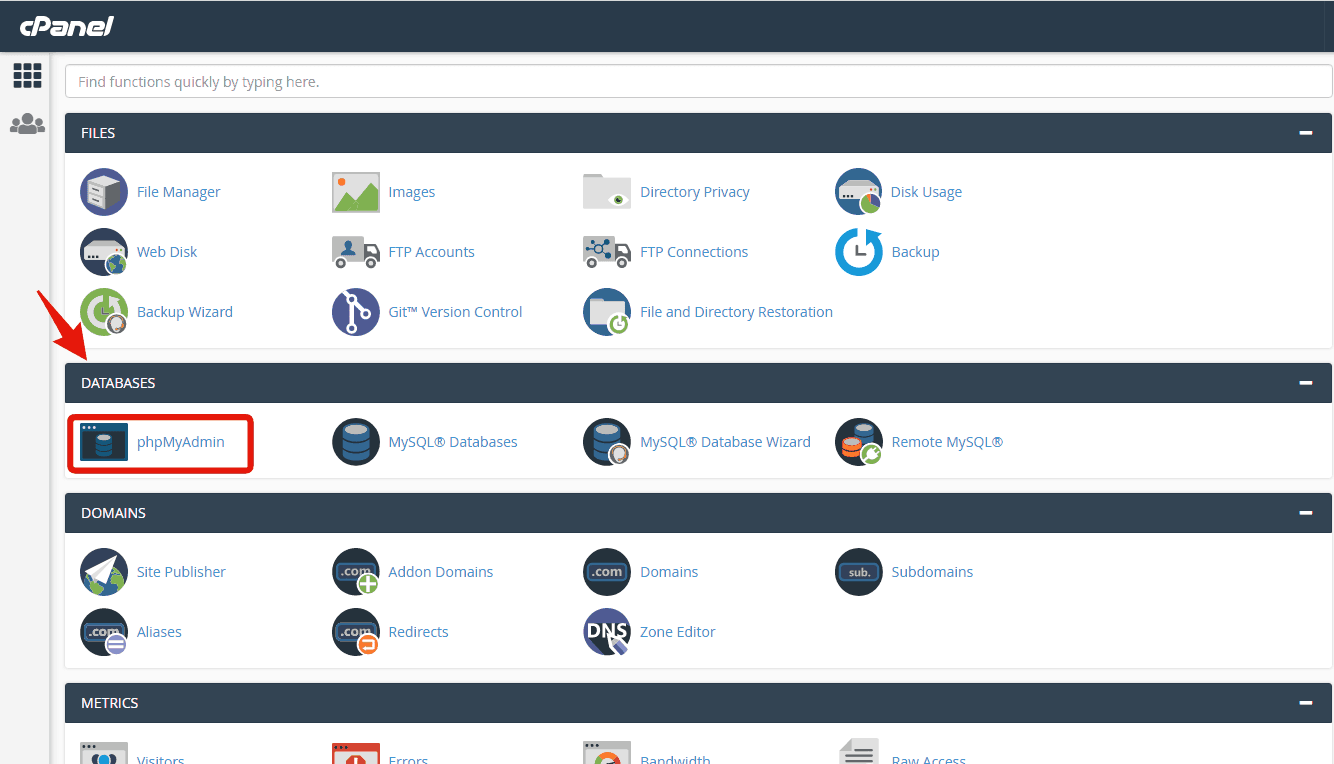
Then go to the phpMyAdmin which is present in the Databases section. Then the phpMyAdmin window will open.
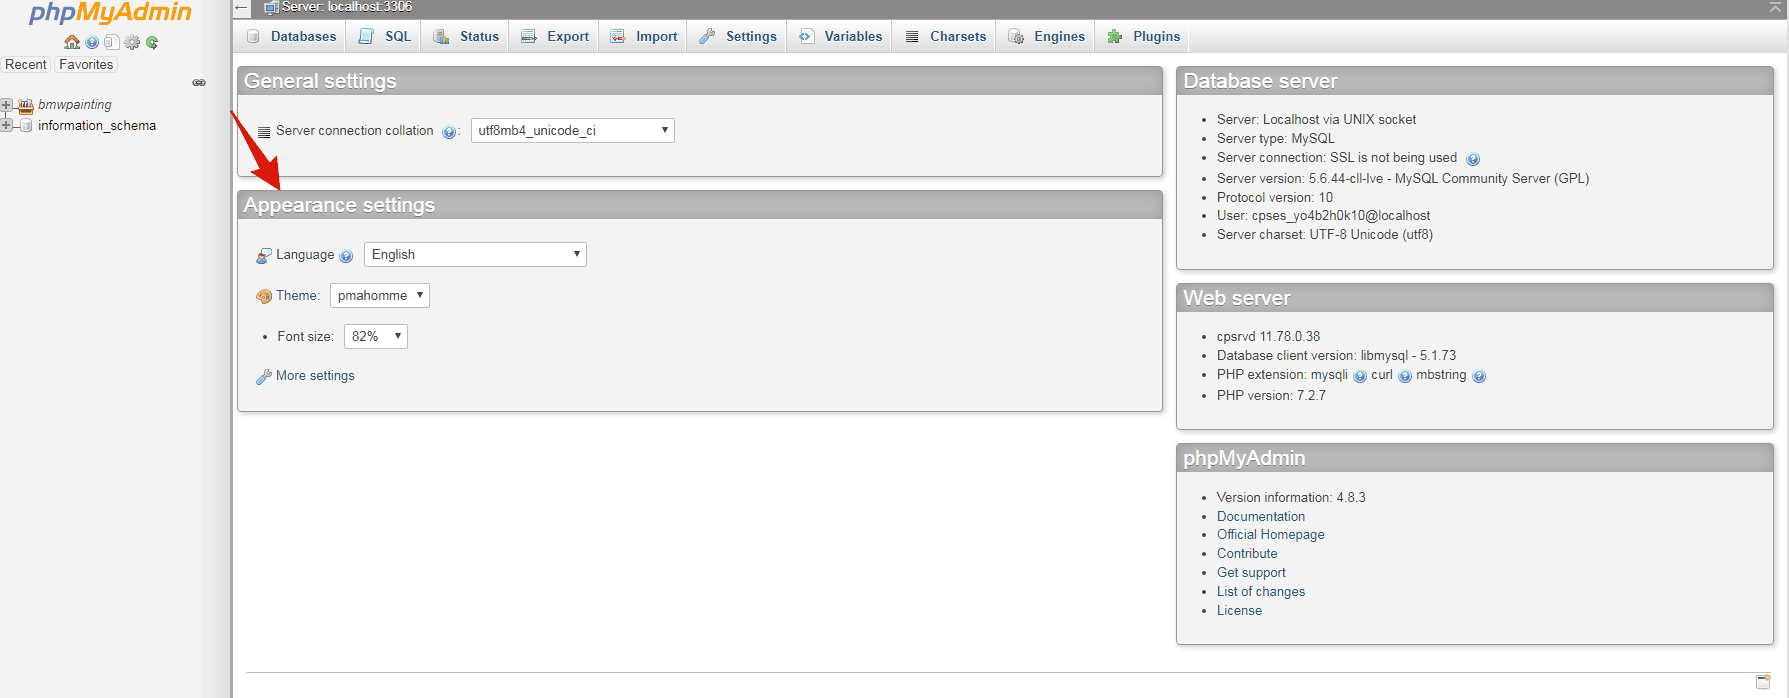
These two steps are common for each task that we will perform using phpMyAdmin.
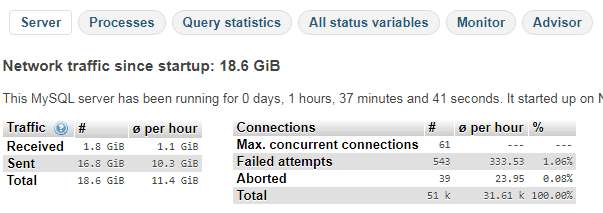
Here you can see all the data related to traffic and connection information for your website.

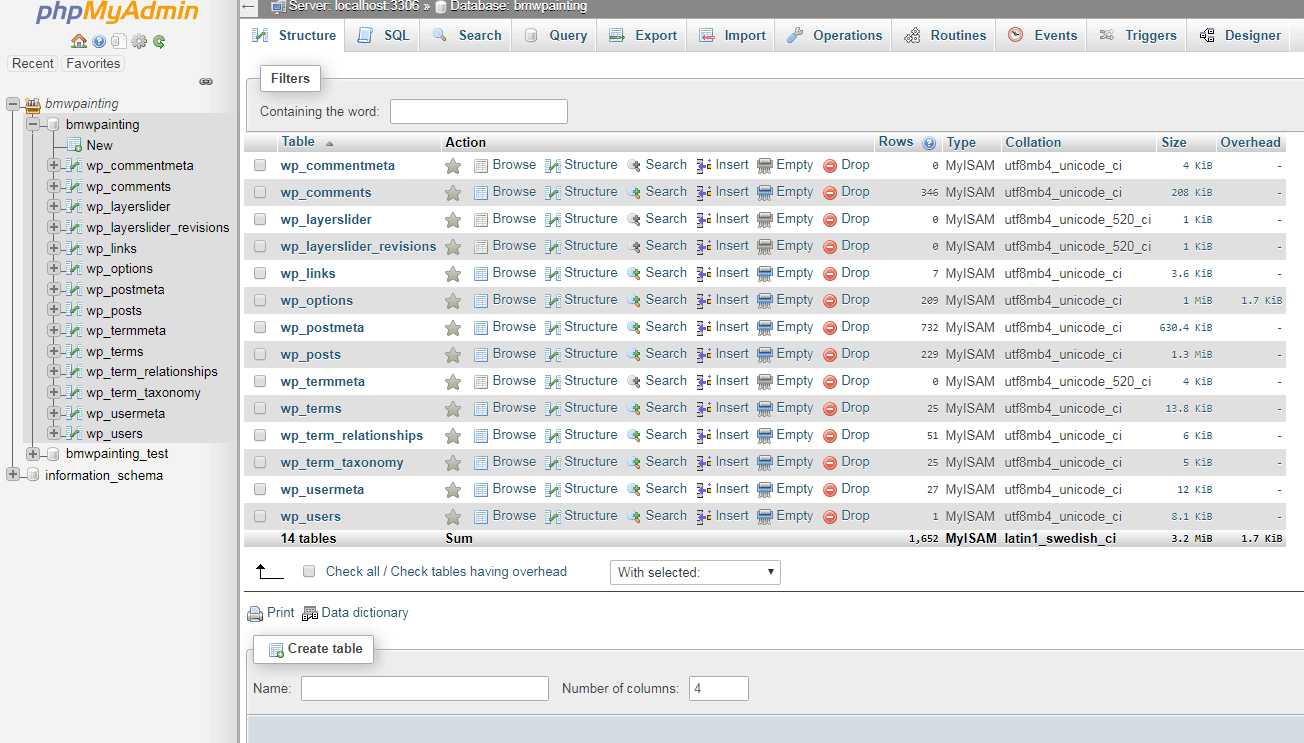
After that, choose the table that you want to edit.
Let's say for example, that you want to edit the wp_posts table. To edit it click on the Browse option present next to it. From here you can edit your post.

- Create New WP Database
Click on Create Database at the top of the page. In some cases, you will not see the option because sometimes your hosting providers do not give you access to create a new database through PhpMyAdmin.
After that, give a name to your database and pick a name that is easier to recognize. Click on the Create button. Now a new blank database is created.

- Remove your WordPress Database
Simply go to your home page, click on Databases, and then select the database you want to delete.
Click on the Drop option present at the bottom of the page to delete the database. This will remove the database tables (if you want to import another database inside this one). If you want to completely remove the particular database then select MySQL® Databases under the Database section, search the database name and delete. This will completely delete the database from the server.

4. Back up, import, and export database
Importing a Database
You can import your database easily in WordPress using PHPMyAdmin. On the homepage of PhpMyadmin click on the Import option.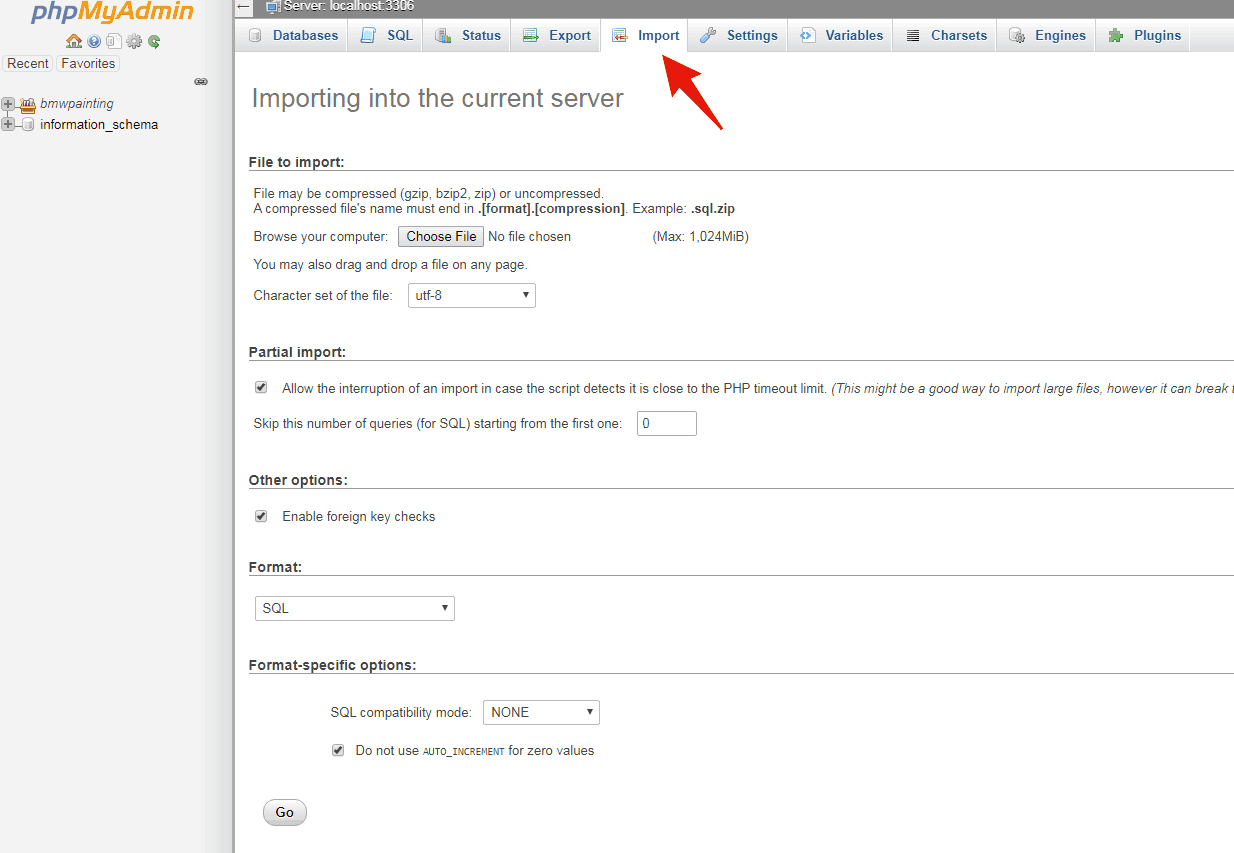
Exporting database
On the home page of PhpMyAdmin click on the Export option present at the top. In the export method section, you can choose either Quick or Custom option. 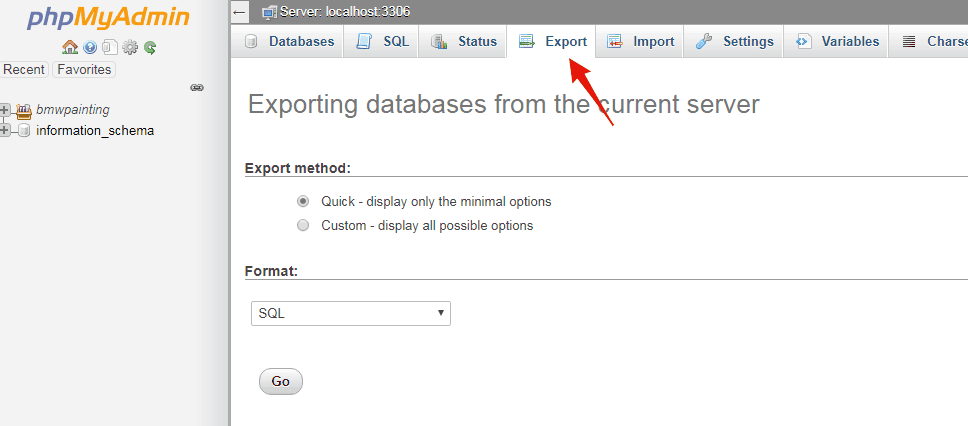
- To instantly back up your database select the Quick option
- To manually select what you’ll export, select Custom
- Select the SQL format and then click Go.
- Next, a dialog pops up asking you to save the file to your computer. Save all your files to your computer, and name these files in such a manner that you can recognize them later.
- That's it, now all the files will download to your computer.
5. Manage Users and passwords using phpMyAdmin
To reset your password:
Go to the homepage of phpMyAdmin.
Then go to the WP database. Go to the wp_users table.

Next click on the Browse option near it.
To change the password click on the Edit button.
Now the edit page will open, here change the user_pass value to your new password and set the function to MD5. At last click on the Go button.
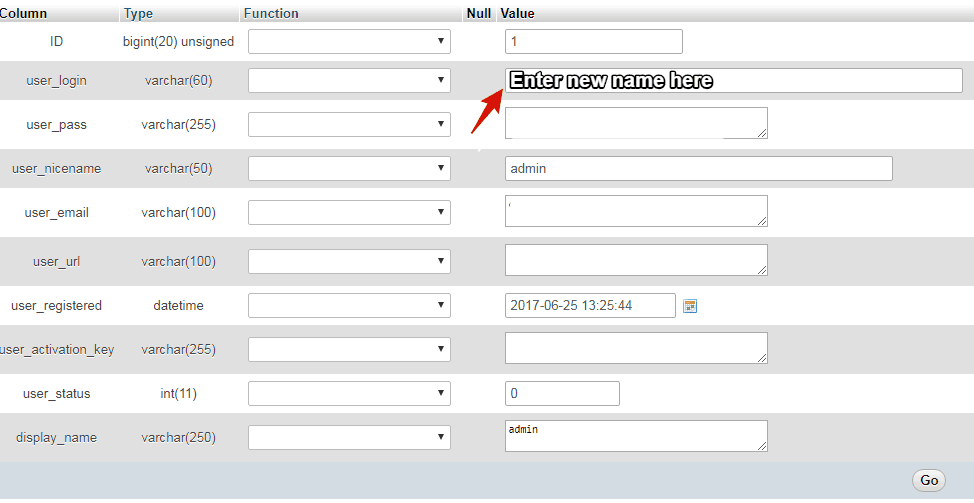
To change the username:
Click on the Browse option present near the wp_users table.
Then a list of all the users will appear. To change the username click on the Edit option next to your user.
Enter your new username in the user_login section.
To add a new user
Click on the Browse option near to wp_users section. The list of all the users will load after that. Then click on the Insert option.
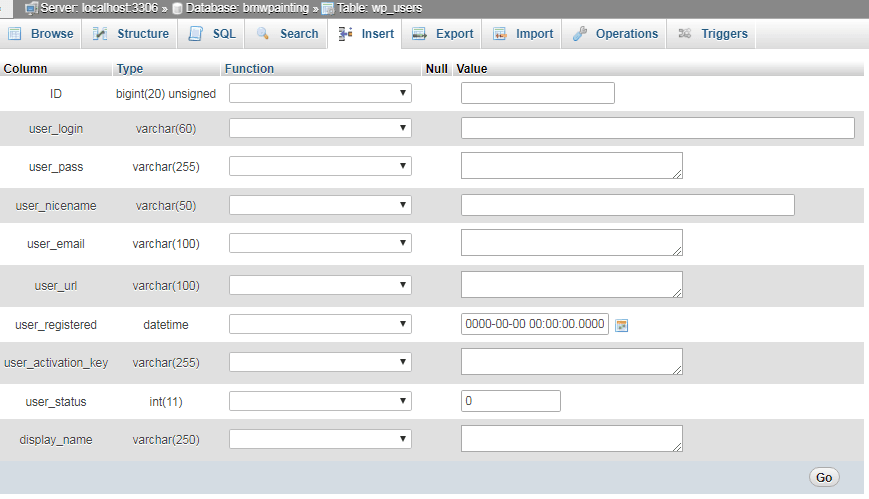
Then fill in the details as instructed below:
- ID- The ID is automatically generated, so leave this section blank.
- user_login- Fill in the username that is used to log in.
- user_pass- Enter the password used to log in to your WordPress.
- user_nicename- For a user-friendly URL, write the URL in the user_nicename section. This may be used if your username has special characters, but you want a URL with only letters.
- user_email- In the user_email section input a valid email address so that you can access your WordPress account emails.
- user_url - In the user_url section keep it blank or enter the URL address of your WordPress site. Add the CURRENT_TIME in the function column, so it automatically adds the time.
- user_activation- Leave the user_activation field blank.
- user_status- Leave the user_status field blank.
- display_name- Enter the user’s name or nickname as it would be displayed on posts and articles in the author field.
After entering all the details click on the Go button to create a new user.