

In WordPress, the WP-Corn tables are used to schedule tasks. But, if you are getting a large chunk of traffic to your site and using built-in corn on your site then your site's speed might be affected. To resolve this issue you have to disable WP-Cron and instead use system cron for better performance.
To disable your WP-Cron follow the below steps:
1. First, log into your cPanel.
2. Then navigate to the wp-cron.php file present in the root folder and open it.
3. Look out for the line that says, “That’s all, stop editing! Happy blogging.”. Add the code given below before this line:
define('DISABLE_WP_CRON', true);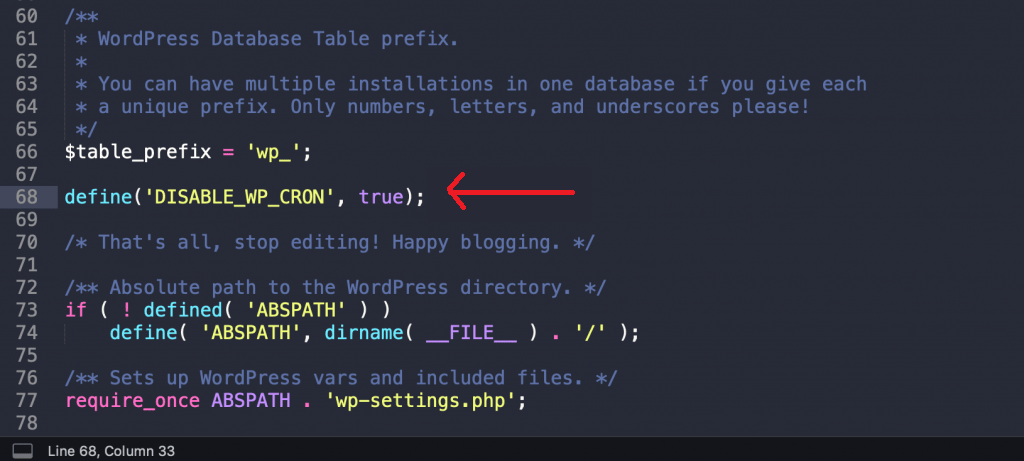
After this, the WP-Cron will be disabled.
To schedule a System cron follow the steps given below:
1. First, log into your cPanel.
2. Click on the Cron Jobs option present in the ADVANCED section.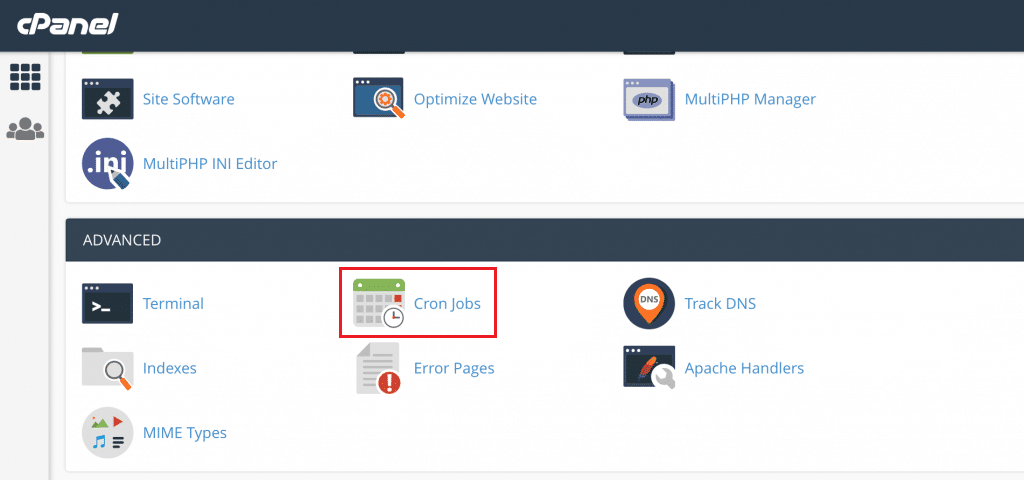
3. Go to Add New Cron Job section. From here you can select the predefined schedule for cron jobs, like once per week, twice per hour, etc. Sometimes your hosting provider sets a limit on how many times you can run the cron job.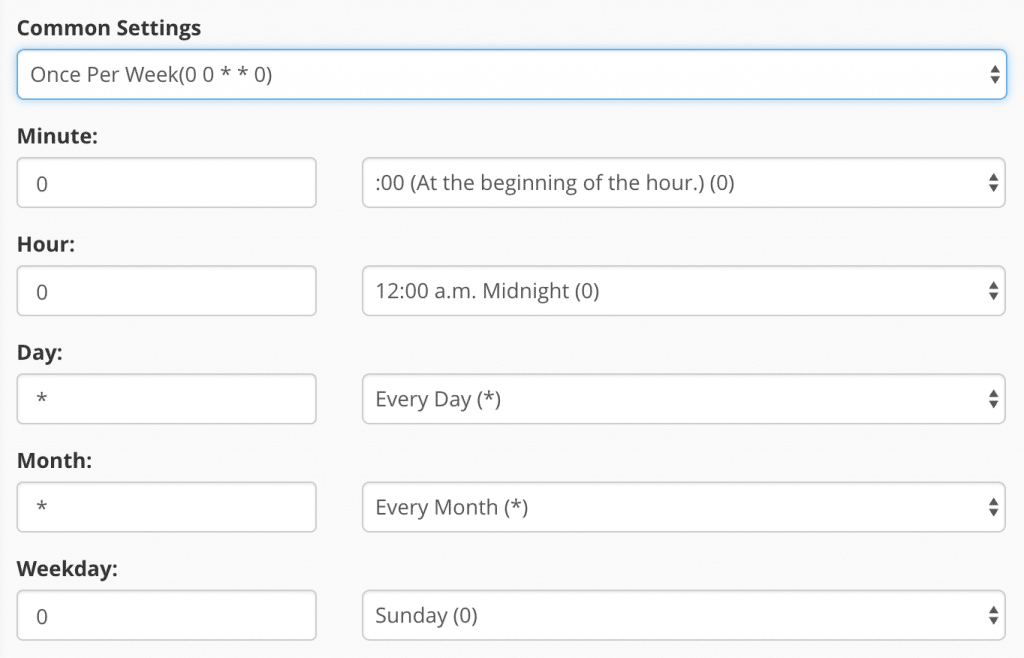
4. In the command section add the below command:
You have to change the 'domain.com' to your domain name. After that click on the Add New Cron Job button.
That's it. You have successfully disabled your wp-cron and scheduled a system cron.