

The full form of REDIS is REmote Dictionary Server and it is an open-source key-value store.
Redis helps to improve the performance of the WordPress site. It speeds up the site by the use of speedy caching. Redis is offered on VPS or on dedicated servers.
Follows the below steps to install Redis Object Cache
1. First, log into your WordPress Administrator Dashboard.
2. Then, go to Plugins>Add New.
3. Search for 'Redis' in the search bar. Several plugins will appear. Then search for the plugin named Redis Object Cache.
4. Then click on the Install Now button.
5. After installing the plugin, click on the Activate button.
With this, the Redis plugin will be installed and activated in your WordPress.
Follow the below steps to configure the Redis Object Cache:
The Redis cache settings page will look like the picture below: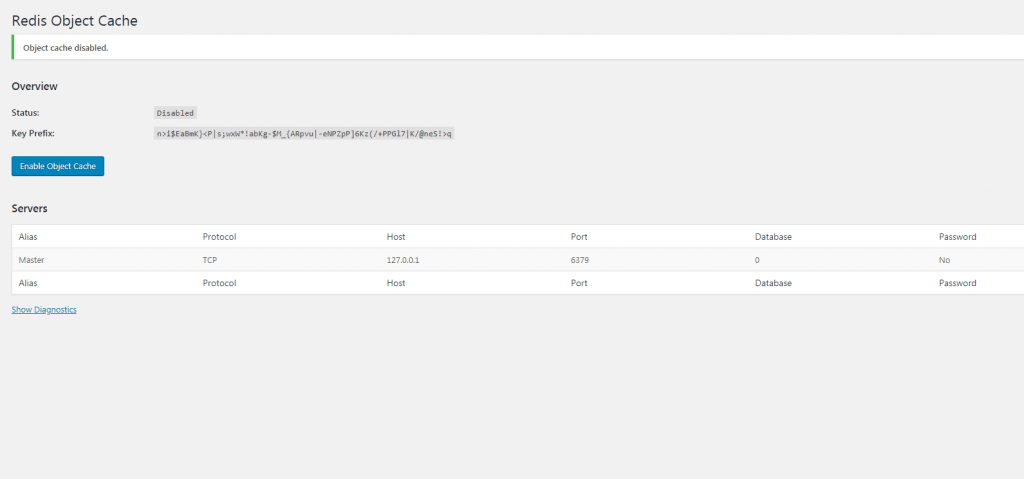
- Make the cache status Disabled.
- Next, click on Plugins. It will display a list of plugins that you have installed and activated.
- Then search for Redis Object Cache and click on Settings. Alternatively, you can go to the Settings in your WordPress menu and click on Redis.
- Next click on the Enable Object Cache button to turn on the cache. After this, the plugin will connect to the server using the default port of 6379.
- To see whether the plugin is connected or not click on Show Diagnostics. You can see in the below screenshot that the plugin is running.

Configuration Parameters for Redis
You can do some settings manually for the Redis Object Cache plugin. A few settings are listed here:
- WP_CACHE_KEY_SALT (default: not set) – To ensure that each cache key is unique you can use this parameter. In case, you have multiple WordPress installations with the same wp-config.php file, you can use this parameter.
- WP_REDIS_SELECTIVE_FLUSH (default: not set) – To flush specifically prefixed caches this option can be used. If you are not using this setting then the full Redis database would be flushed.
- WP_REDIS_MAXTTL (default: not set) –With this parameter, you can set the maximum “time to live” for cache keys that have their expiration time set to 0.
- WP_REDIS_GRACEFUL (default: not set) – If you set this parameter to false then friendly (graceful) failures get disabled. This also enables you to see any errors or exceptions.
Generally, you will see performance improvement using the default settings provided in the plugin. But you can also modify the settings manually according to your preference. The list of settings can be found in the Details tab of the plugin.
In this way, you can configure Redis for your WordPress site, and in return, it will improve your website's performance.