The caching plugins in WordPress help to improve the speed of a site. The caching plugins make a static copy of the website, hence reducing the time required to render a site. So you need to clear the cache so that WordPress will not display you the older version of the website.
So, let’s see the cache clearing process using various popular plugins such as:
- W3 Total cache
- WP Super Cache
- WP fastest cache
- Hyper Cache
I) W3 Total Cache
- First, log in to your WordPress Admin Account.
- In the navigation menu select the Performance option and click on Dashboard.
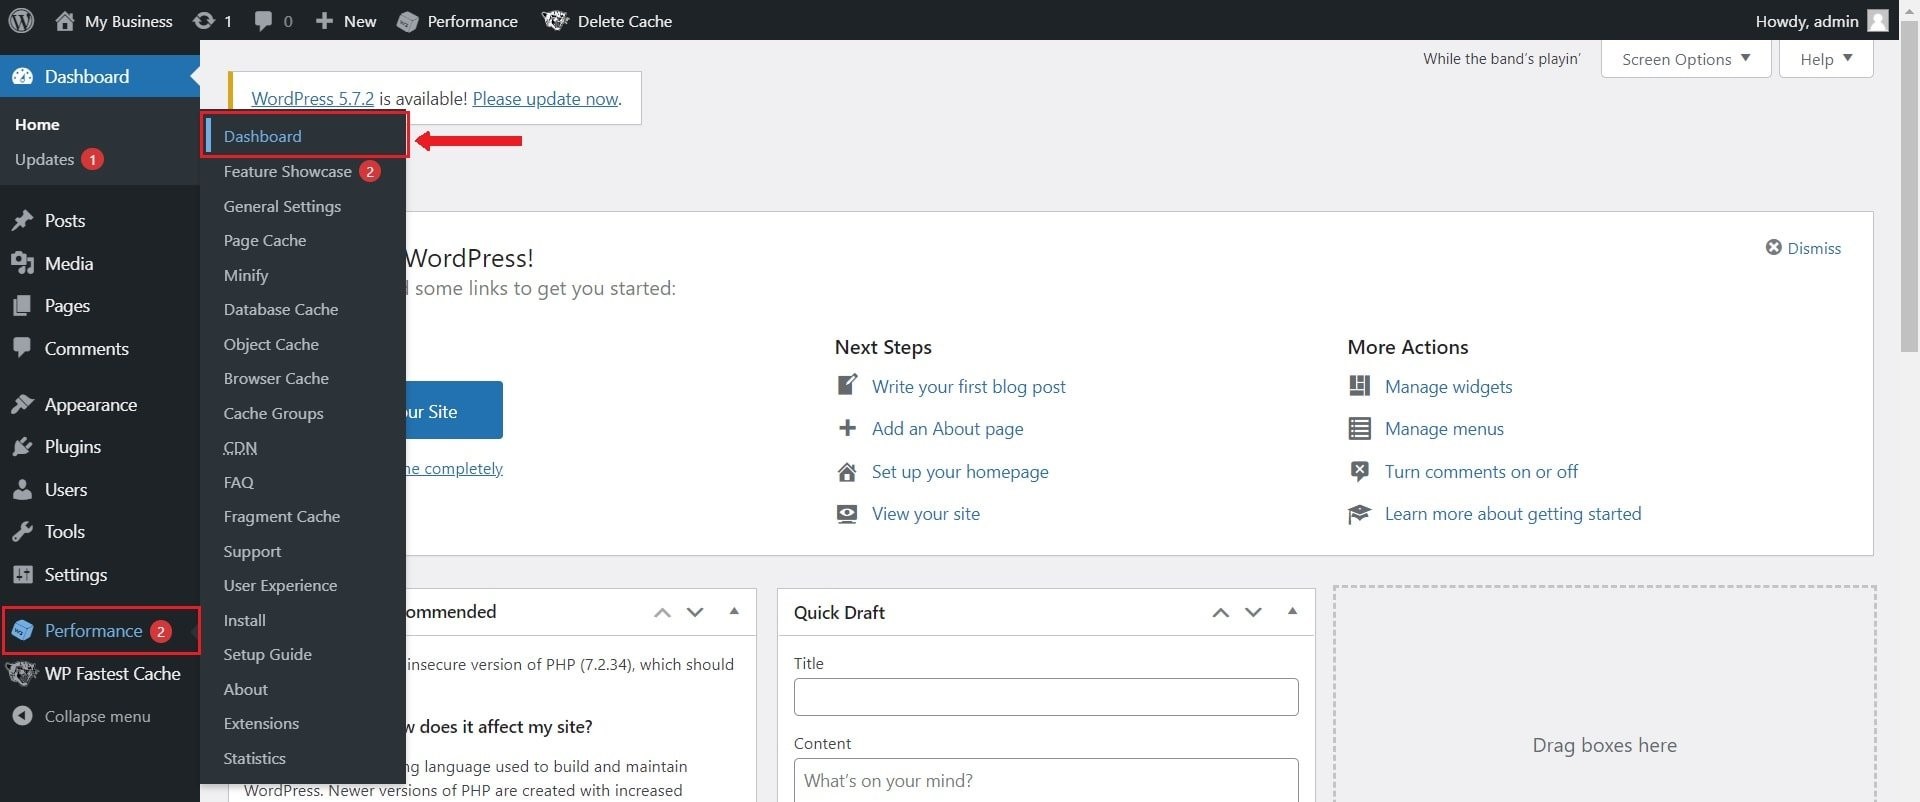
- On the top of the dashboard Click on the empty all caches button.
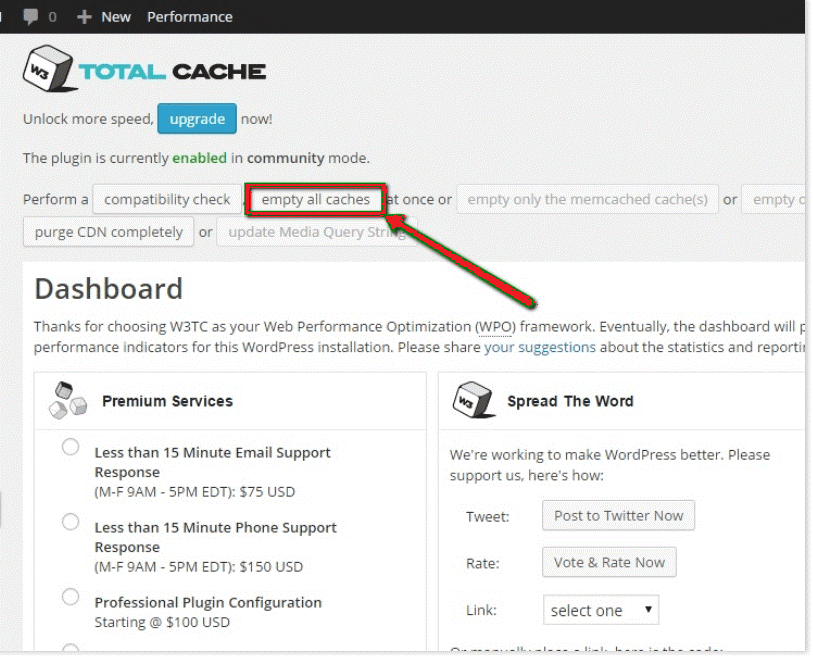
- A message will show up saying “All caches successfully emptied”, Which means the cache clearing process is successful.
II) WP Super Cache
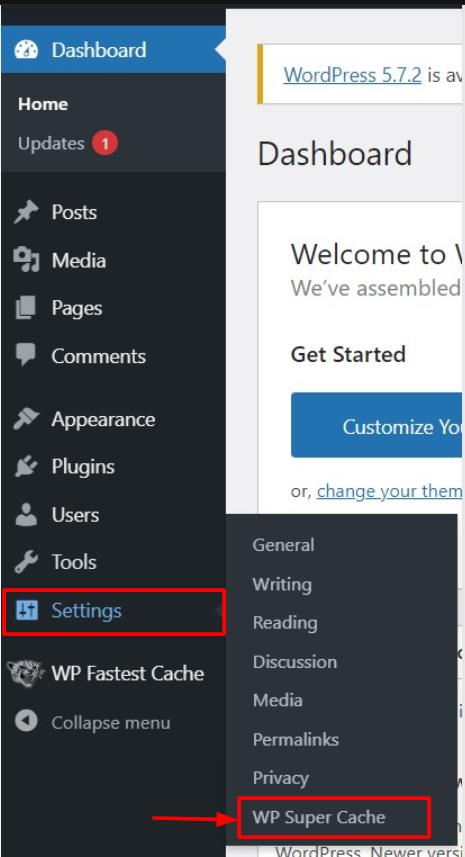
- Log in to your WordPress Admin Account.
- Next, go to Settings and click on WP Super Cache.
- Click on the Contents tab present on the top bar of the window.
Here all the cached data of your website will appear. All the cached files of cached and expired pages will appear.
By clicking the Delete Expired button you can delete expired files. To delete all cached files click the Delete Cache button. 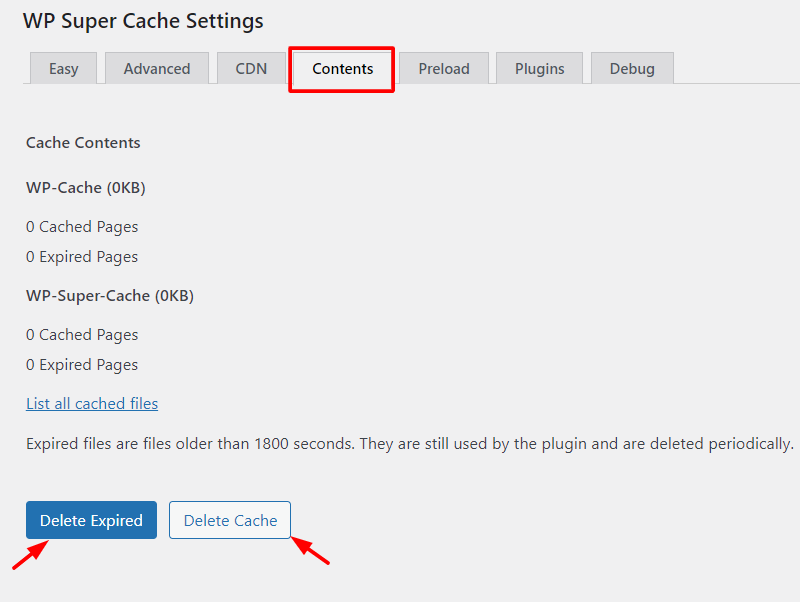
III) WP Fastest Cache
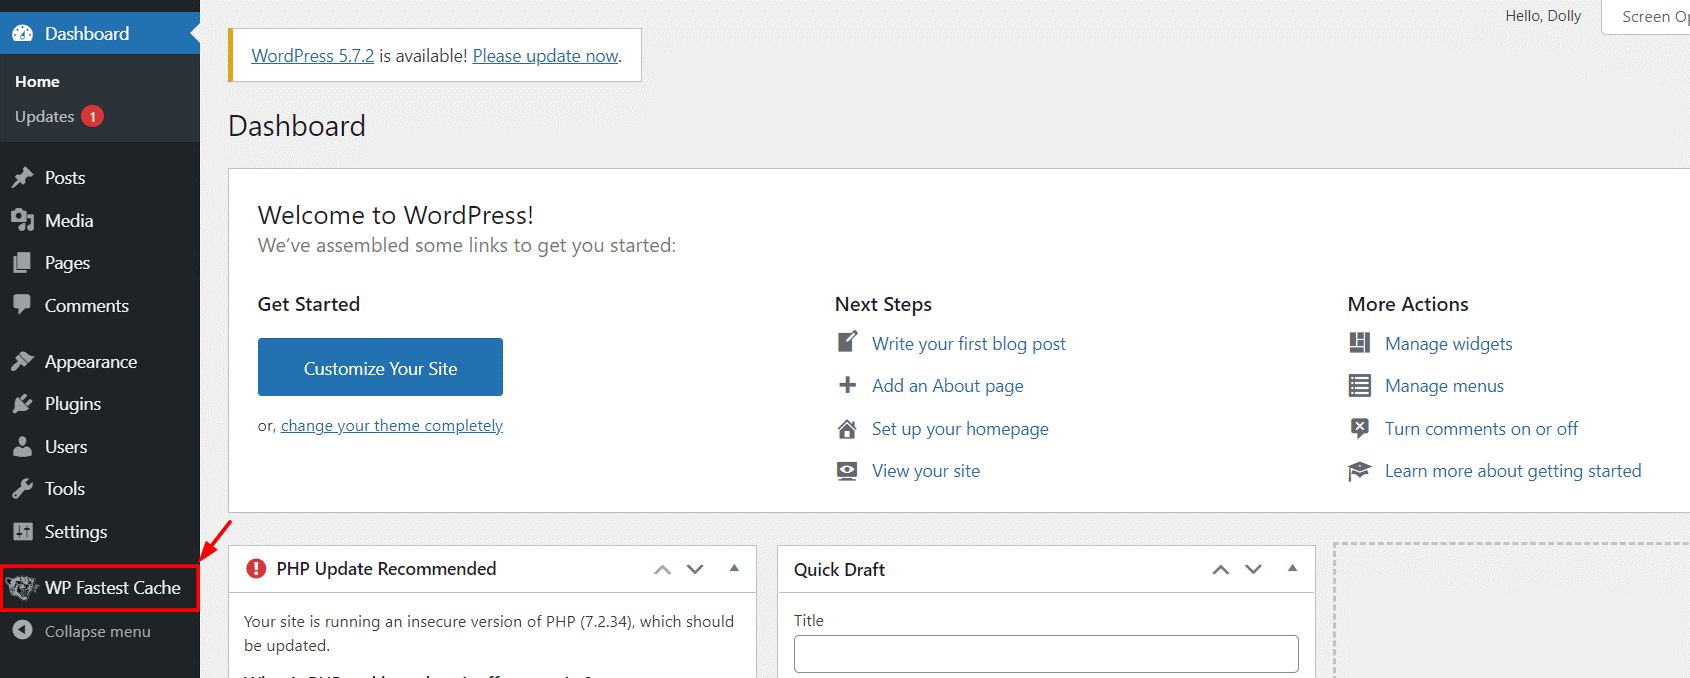
- Log in to your WordPress Admin Account first.
- Then in the navigation menu click on the WP Fastest Cache.
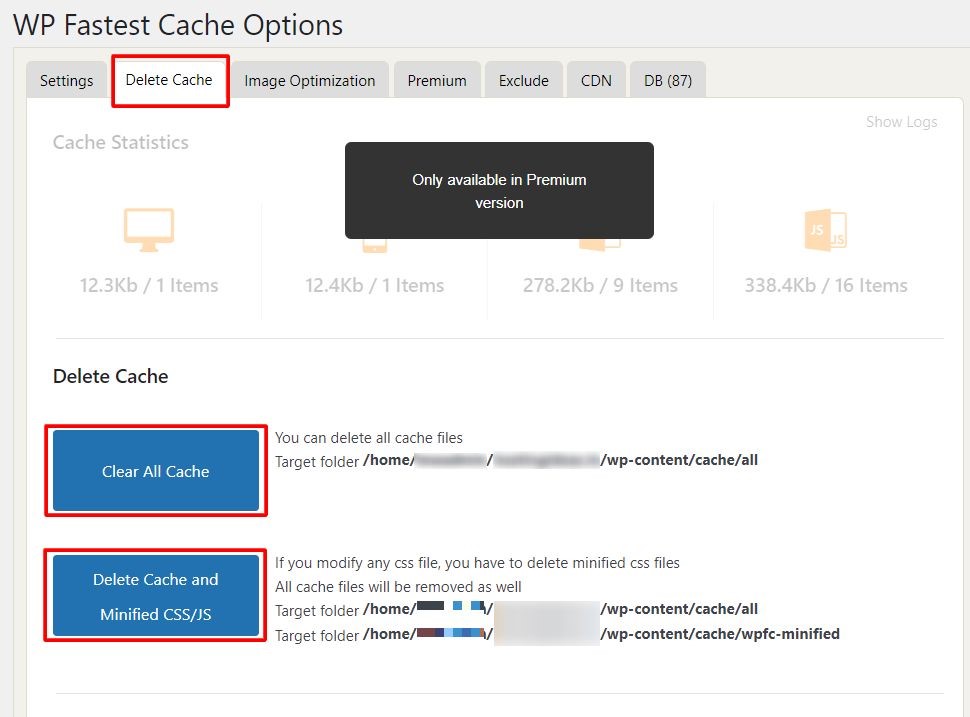
- Next, select the Delete Cache tab.
Here, you have options to clear only the cache files or minified CSS files along with them.
- To clear only the cache files click on Clear All Cache and to clear minified CSS files along with them click on Delete Cache and Minified CSS/JS button.
- The system will show a success message as below.

IV) Hyper Cache
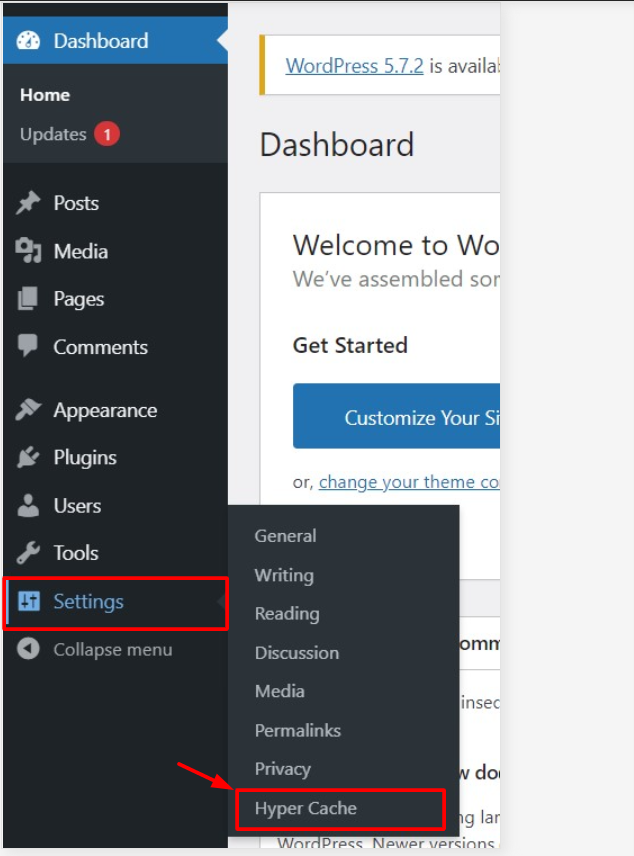
- As a first step, log in to your WordPress Admin Account.
- In the navigation menu go to Settings and select Hyper Cache.
- Click the Clean the whole cache button.
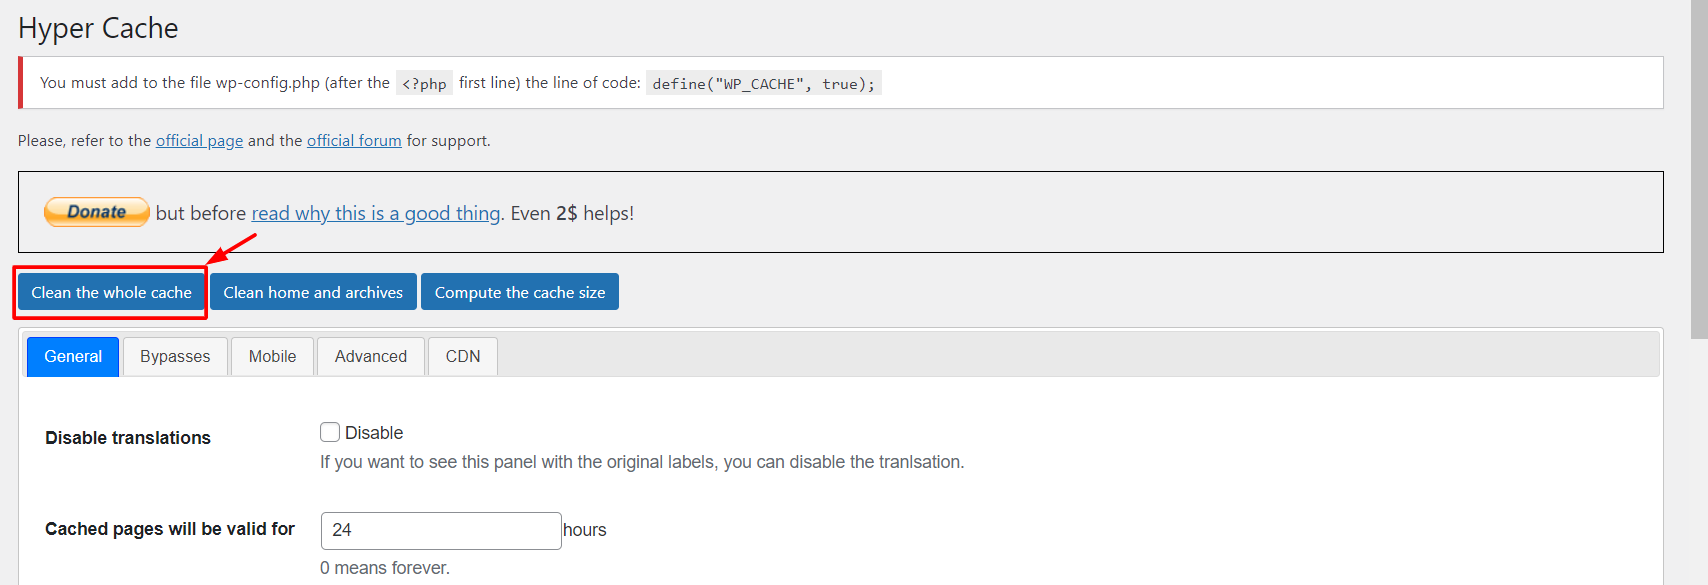
You will see a message saying “The cache folder has been cleaned.”